


To disable recursion, right-click on your DNS server and go to 'Properties'.
Click the 'Advanced' tab.
Then check the box labeled "Disable recursion"

Congratulations! You have now set up DNS in Windows Server 2008 and have set up DNS records for your domain name.
You
can create additional DNS records as needed (MX, CNAME, etc) by
right-clicking on the domain under Forward Lookup Zones and selecting
the appropriate type of record you wish to create.
You
can test that your DNS server is properly serving DNS from a Windows
command prompt, by using the nslookup command in this format:
nslookup example.com ns1.yourdomain.com
For example: 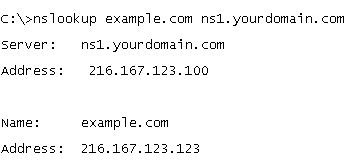 | |


